Orly DIY Manicure

Orly DIY Manicure
Hands Up! Who loves a bit of self-pampering?Orly gives you the 101 on D.I.Y Manicures!
Whether you change your nail colour more often than your outfits, or love the way a salon-quality manicure leaves you feeling pampered... Polish like a pro with these top tips from ORLY Professional Nail Care's Australian Creative Director and celebrity manicurist Fiona Hay.
Step One: File
"File nails into a square shape with rounded corners, known as a 'squoval' for a natural look. If your nail beds are quite short, go for a rounder oval shape as it elongates the nail. If your fingers are longer, a flattering length is just beyond than the. Always remember to file nails in one direction only, because sawing back and forth weakens the nail."
Step Two: Cuticle Care
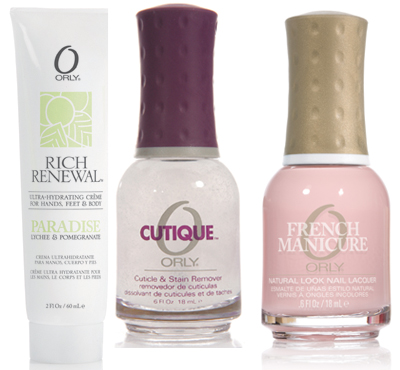
"Apply a softener to cuticles such as ORLY Cutique cuticle & stain remover - the exfoliating properties gently remove dead tissue from cuticles to promote healthy growth. Wait 30 seconds before gently pushing back cuticles with an orange wood stick and then rinse hands with warm water. Next, massage a drop or two of cuticle oil, like ORLY Cuticle Care Complex, into the cuticle area. Taking care of your cuticles is the easiest and most overlooked way of growing healthy, strong nails."
Step Three: Moisturise
"Apply a nourishing hand cream to promote healthy hands, cuticles and nails. The ORLY Rich Renewal range offers four fab, non-greasy, rich hand creams which contain skin softening shea and cocoa butters, hydrating aloe vera and anti-ageing Vitamins A&E. The fragrances are divine too!"
Step Four: Prep
"Before applying any lacquers, it is important to remove any surface oils from the nail plate. This can be done by wiping the nails with a nail polish remover or ORLY Clean Prep to ensure excellent lacquer adhesion to keep polishes on for longer."
Step Five: Base
"Apply a good-quality base coat to ensure longevity of your polish and prevent nails from staining. ORLY Bonder is great for gripping lacquer to the nail plate - its rubberised structure makes it act like Hollywood Tape for nails plus its flexibility prevents lacquer chipping."
Step Six: Colour
"For a classic French Manicure, apply one coat of the 'natural' nail colour, followed by the white tip application - ORLY French Manicure Pointe Blanche has a finer brush for making tips easy. Follow with a second coat of the natural shade to seal the white tip. My favourites for a natural French look are ORLY French Manicure in Rose Coloured Glasses or Sweet Blush."
Step Seven: Top Coat
"A top coat is a crucial step in any manicure, sealing in your polish for longer wear, high shine and even UV protection and can be applied straight away. If high speed drying time is your priority, ORLY Sec'N Dry immediately dries each layer of polish for a quick-fix, hard protective finish. If chipping is a problem, try ORLY Wont Chip, a unique acrylic resin designed to bind and lock in colour. Most importantly, don't forget to apply a brush stroke of top coat across the free edge tip of the nail, this seals off the lacquer and prevents chipping and moisture getting under the polish."
Fiona's Top Tips at Faking It like a Pro
For all polishes, base and top coats, there is one simple technique - each nail should be painted in three even strokes. OK, you can have four for thumbs!
When applying any lacquer, always coat the free edge of your nails - this prevents chipping and ensures all surfaces are sealed.
Keep your manicure glossy and protected by reapplying a top coat each day.
Apply cuticle oil and hand cream just before bed so it has a chance to absorb while you sleep and wont be worn or washed off.
ORLY is available from selected salons, pharmacies and online at www.orlybeauty.com.au
ORLY custom-blends to create over 150 colours and limited edition collections that are all '4-free' from harmful chemicals DBP, Formaldehyde / Formaldehyde Resin and Toluene.
MORE
- Isabella Rossellini Lancôme Muse
- Estée Lauder Brow Now
- INIKA Certified Organic Rosehip Oils
- Australis Browz It! and Oh Hai Brow!
- jane iredale The City Nights Collection
- Napoleon Perdis $230 Gift With Purchase
- jane iredale The Skin Care Makeup Celebrates 20...
- Max Factor Excess Volume Extreme Impact mascara
- Clinique's Lash Power Feathering Mascara
- Yves Saint Laurent Gloss Volupte
- Estee Lauder Bronze Goddess Summer 2014


