Carpet Court's Elevate

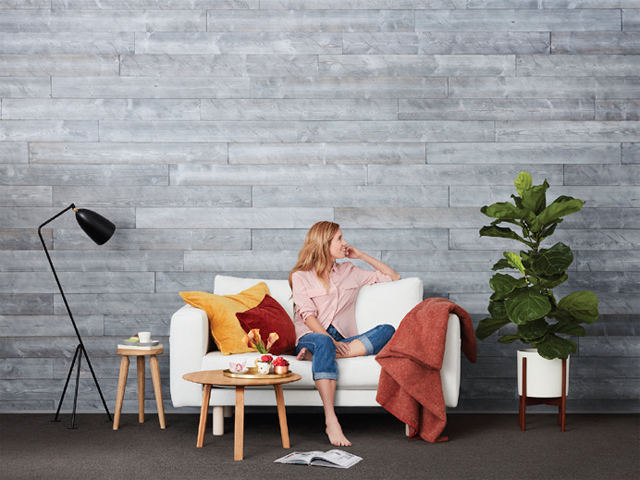
Carpet Court has turned its attention from the floor to the walls with the introduction of Elevate, purpose-built timber wall panels that have been engineered specifically for DIYers.
A simple way to bring dimension, texture and warmth to your home, Carpet Court's Elevate wall panel range is crafted from sustainably-sourced plantation timber.
Each lightweight plank has an adhesive backing, so you can simply 'peel and stick' on to most wall and ceiling surfaces.
Carpet Court's Style Ambassador, Darren Palmer says the Elevate range can be used in a variety of ways to create symmetry, continuity and style in your home, no matter if your look is Scandi, coastal, Hamptons, industrial or modern.
"Wooden wall panels can help elevate a room lacking atmosphere, as well as add a little formality to new and modern homes. The panels are perfect for 'zoning' open plan homes, such as reception areas like hallways and stairways; as well as living spaces like dining areas," Darren says.
"For an understated approach, the paneling can add visual interest on the risers of a kitchen island bench, or act as a natural bedhead feature in a bedroom. Best of all, they can hide a multitude of imperfections, such as uneven surfaces and are strong enough to hold your valued pictures and artwork."
"Proportion is key – vertical paneling (even wrapping one-wall paneling on to the ceiling) is an effective way to make ceiling heights appear taller. Conversely, horizontal paneling can widen the appearance of a narrow room. If you're going to use paneling in more than one area of the home, stick to one style and colour to ensure continuity," Darren says.
Carpet Court's Elevate range launches in March 2019 and will be available in 10 wooden stains. Each wall panel is 1210mm x 128mm x 5mm thick and retails for $69 per square metre.
How-To Install Carpet Court Elevate Wall Panels
Carpet Court's Elevate range can instantly transform walls, island benches, headboards and more. Available in an array of wood grains and colour finishes, they can be cut to fit your individual space and hung in a few simple steps – an easy weekend DIY project.
STEP 1: ACCLIMATE THE WOOD
Unpack the wall panels in the room in which they will be installed, at least 72 hours prior to installation. This is to ensure the wood won't expand or shrink with the changes in relative humidity in the surrounding air.
STEP 2: GATHER YOUR SUPPLIES
You will need a 60 cm spirit level, measuring tape, pencil, roller, hand saw/jigsaw, a clean soft cloth and a chalk line.
STEP 3: PREPARE THE SURFACE
STEP 4: DON'T ASSUME BASEBOARDS OR CEILINGS ARE LEVEL
Check that your skirting boards and ceilings are level with your spirit level. If they're not, measure 50 cm down the wall from the ceiling and make a pencil mark. Then use a chalk line to snap a level line across the wall that you can use as a reference when installing the planks.
STEP 5: INSTALL A METAL TRIM FOR EXPOSED CORNER WALLS
For outside corner walls or window openings, use a metal trim for a polished finish. Remove the adhesive at the back of the metal trim and secure into place.
STEP 6: ADHERENCE TEST
Test one plank on the prepared wall to ensure the panel adheres to the wall correctly.
STEP 7: START APPLYING THE PLANKS
Apply one plank at a time by removing the adhesive strips and sticking it to the wall. To assist with adhesion, use your roller, applying lots of pressure. Note, always work on one row at a time, either horizontally or vertically.
STEP 8: CUTTING PANELS TO FIT WALL EDGES, AROUND POWER OUTLETS
Measure the space that needs to be covered and then measure the same dimensions on your panel, marking with a pencil so you know where to cut. Then use your hand or jigsaw to cut the plank to size. Remove your adhesion strips and apply to the wall (refer to step 4).
STEP 9: ENJOY!
MORE


