Alfresco Fun: Weekend DIY Dulux Painting Project

Reimagine Your Outdoor Entertaining Space For Alfresco Fun with Dulux
There's nothing quite like summer – the ocean breeze, warm sun, balmy evenings and endless days spent with family and friends. And while the sunny season has arrived, it's not too late to transform your outdoor entertaining space from drab to fab, guaranteeing your home will be the holiday hotspot this summer!
Whether you are after a chic poolside party area, a sunroom retreat or patio outdoor dining setting, a lick of paint over the weekend can go a long way to modernise and refresh your outdoor area.
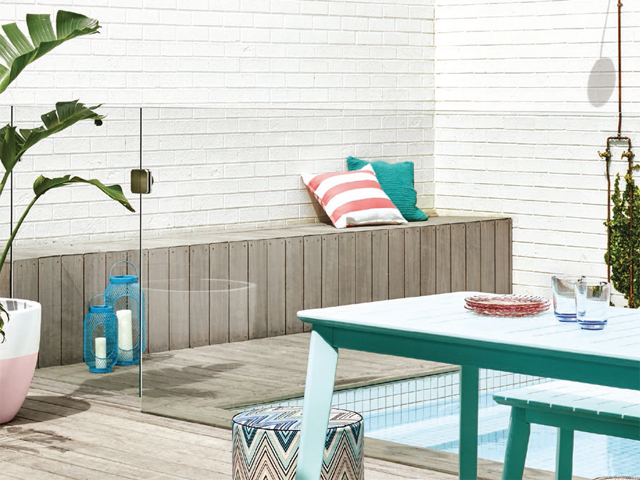
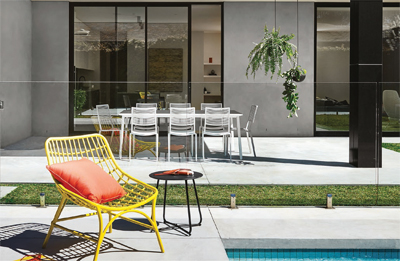
Dulux Colour Expert, Andrea Lucena-Orr says lashings of a cooler colour such as pale mint, or bold yellow contrast beautifully with exterior neutrals - timeless blacks, whites and mid-tone timbers - which instantly amplifies an outdoor area's style quotient.
"Make your outdoor entertaining space work by giving it as much styling and considered colour attention as your indoor spaces – it will help establish the zone, be it for living, dining, relaxing or play," she says.
"Incorporating uplifting colour and prints in a neutral space can be transformative – adding a sense of energy and fun, reminiscent of luxury hotels and resorts.
"Exuberant shades such as Dulux Sea Foam or Lemon Delicious, are colours that can really make a huge impact, even in small doses. They are great for making a statement on outdoor furniture settings and exterior accessories."
To ensure continuity between your interior and outdoor areas, you can easily add colour to your pool retainer walls, the fence and the exterior of your home to tie it all together. Neutral tones are perfect, as they will help frame and draw attention to the accent colours in your statement outdoor furniture and accessories.
These quick painting projects can be completed over the course of a weekend, meaning you'll still have plenty of time to show it off to your guests throughout the season of outdoor entertaining. Here are some poolside DIY projects you can try to get you on your way.
WALLS
1: Gather your painting supplies – Dulux Weathershield in your chosen colour(s), drop sheet, high quality synthetic brush for cutting in, medium nap roller, roller tray, 400 grit sandpaper, painter's tape, old cloths.
2: Ensure the surface has been properly prepared prior to starting to paint. Follow the label on the can for more information.
3: Start by cutting in around the edges of the wall with a brush – they are areas the roller cannot easily reach.
4: Load the roller in the tray.
5: Start rolling the wall in an 'M' pattern. Continue over the same section until the wall is evenly covered. Roll up to the area of 1m2 size or paint wall in sections.
6: Before painting starts to dry, using an unloaded roller, begin in the top left corner of your wall and gently let the roller roll down to the base in a straight line with no pressure. A lightness of touch will prevent new roller marks from forming. Repeat this action only this time, slightly overlap your last movement so your roller rubs away the line created by the previous stroke. Continue this across the area you have painted. This is called laying off.
7: Once the first coat is dry, repeat the total process again with a second coat. A third coat is required for bare/new surfaces and depending on colour selected.
8: Allow the first coat to dry and repeat the total process again with a second coat.
 LANTERN
2: Apply Dulux Duramax colour in multiple light, mist coats.
3: Admire the transformation. Great Job!
TABLE & BENCH SEATS
1: Gather your painting supplies – Dulux Aquanamel in your chosen colour(s), Dulux 1Step Prep (if applying on a new timber surface), drop sheet, high quality synthetic brush for cutting in, short nap roller, roller tray, 400 grit sandpaper, painter's tape, old cloths.
2: Ensure the surface has been properly prepared prior to starting to paint. If this is a new timber surface, prime with Dulux 1Step Prep. Follow the label on the can for more information.
3: Start by cutting in around the edges of furniture piece.
4: Apply Dulux Aquanamel to the surface using short, horizontal brush strokes.
5: Once you've completed an area, lightly smooth over the painted section with long brush strokes. Do not reload the brush when you do this. As a tip, do not brush too much – a few strokes should be enough to smooth the surface.
6: Allow 2 hours to dry, then give the surface a light sand with 400 grit sandpaper.
7: Repeat above steps for a second coat.
Dulux Weathershield Tested for over 40 years in Australian conditions, Dulux Weathershield is guaranteed to protect your home for as long as you live there. Designed to withstand all weather from extreme heat to heavy rain, Dulux Weathershield also prevents UV damage and resists mould and stains.
Dulux Aquanamel A water-based interior and exterior acrylic enamel, Dulux Aquanamel doesn't yellow over time, is fastdrying, low odour and achieves an ultra-smooth and tough finish that resists chipping.
Dulux Duramax A high-performance enamel that delivers maximised coverage, Dulux Duramax spray paint has an innovative rapid dry formulation ensuring the coating is touch dry in 20 minutes and ready to use in an hour.
For more information about simple DIY projects for the home using Dulux Weathershield or Aquanamel, visit www.dulux.com.au
MORE


